


See our updated phone specific articles:

How to Buy an eSIM
To start, choose a data package suitable for the country you’re visiting or currently in. You can explore the full range of eSIM options on our Travel eSIMs page.
Once you purchase an eSIM, you’ll typically receive a QR code via email within 5 minutes, if you're using IOS you can also install the eSIM simply by clicking a button in the ZenSim app.
How to Activate a travel eSIM
Activating an data-only eSIM is different to installing one. Activation happens automatically when you arrive in your destination, but before this you need to install your eSIM. To do this, just follow these steps:
- Open the Camera app on the device where you’ll be installing the eSIM data plan.
- Scan the QR Code with your camera. Tap the notification that appears, which should mention a Data Plan.
- On the next screen, follow the instructions to add the new data plan. The default settings are fine to accept.
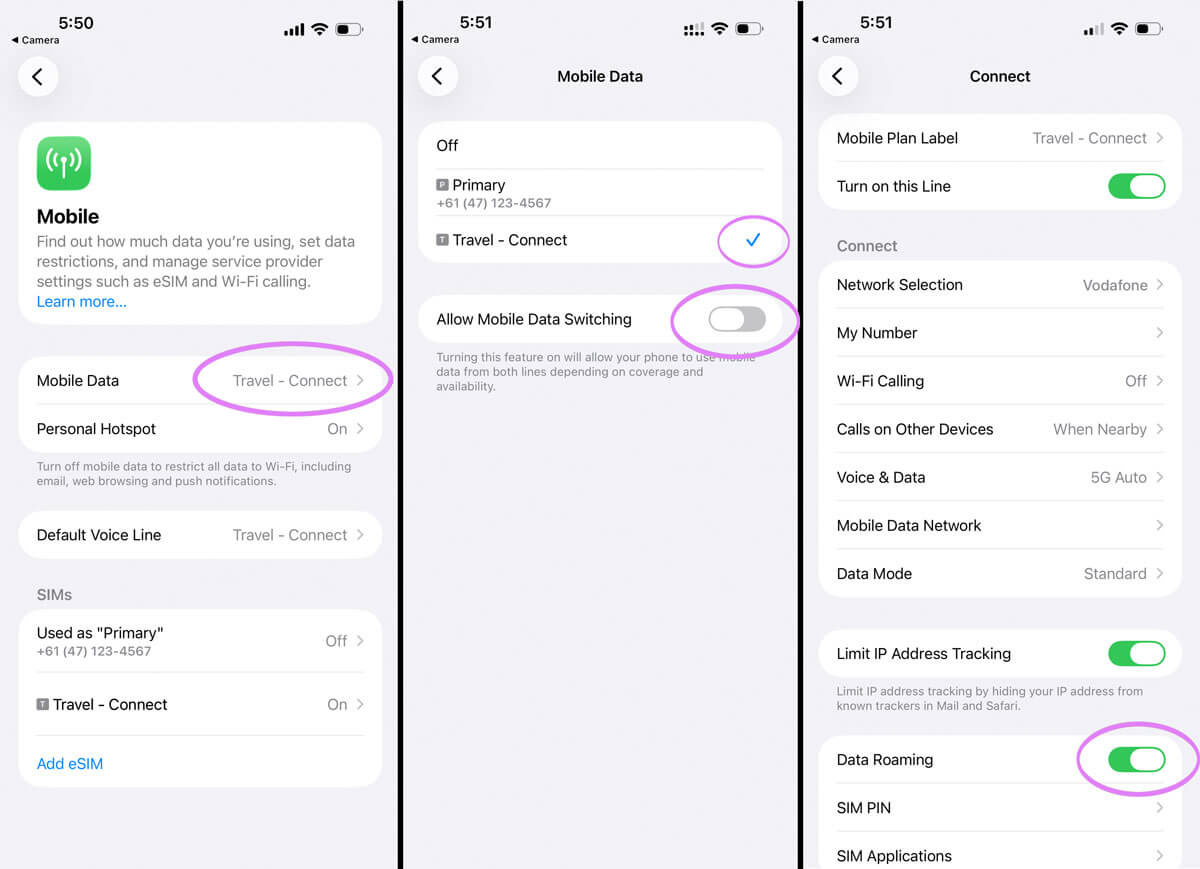
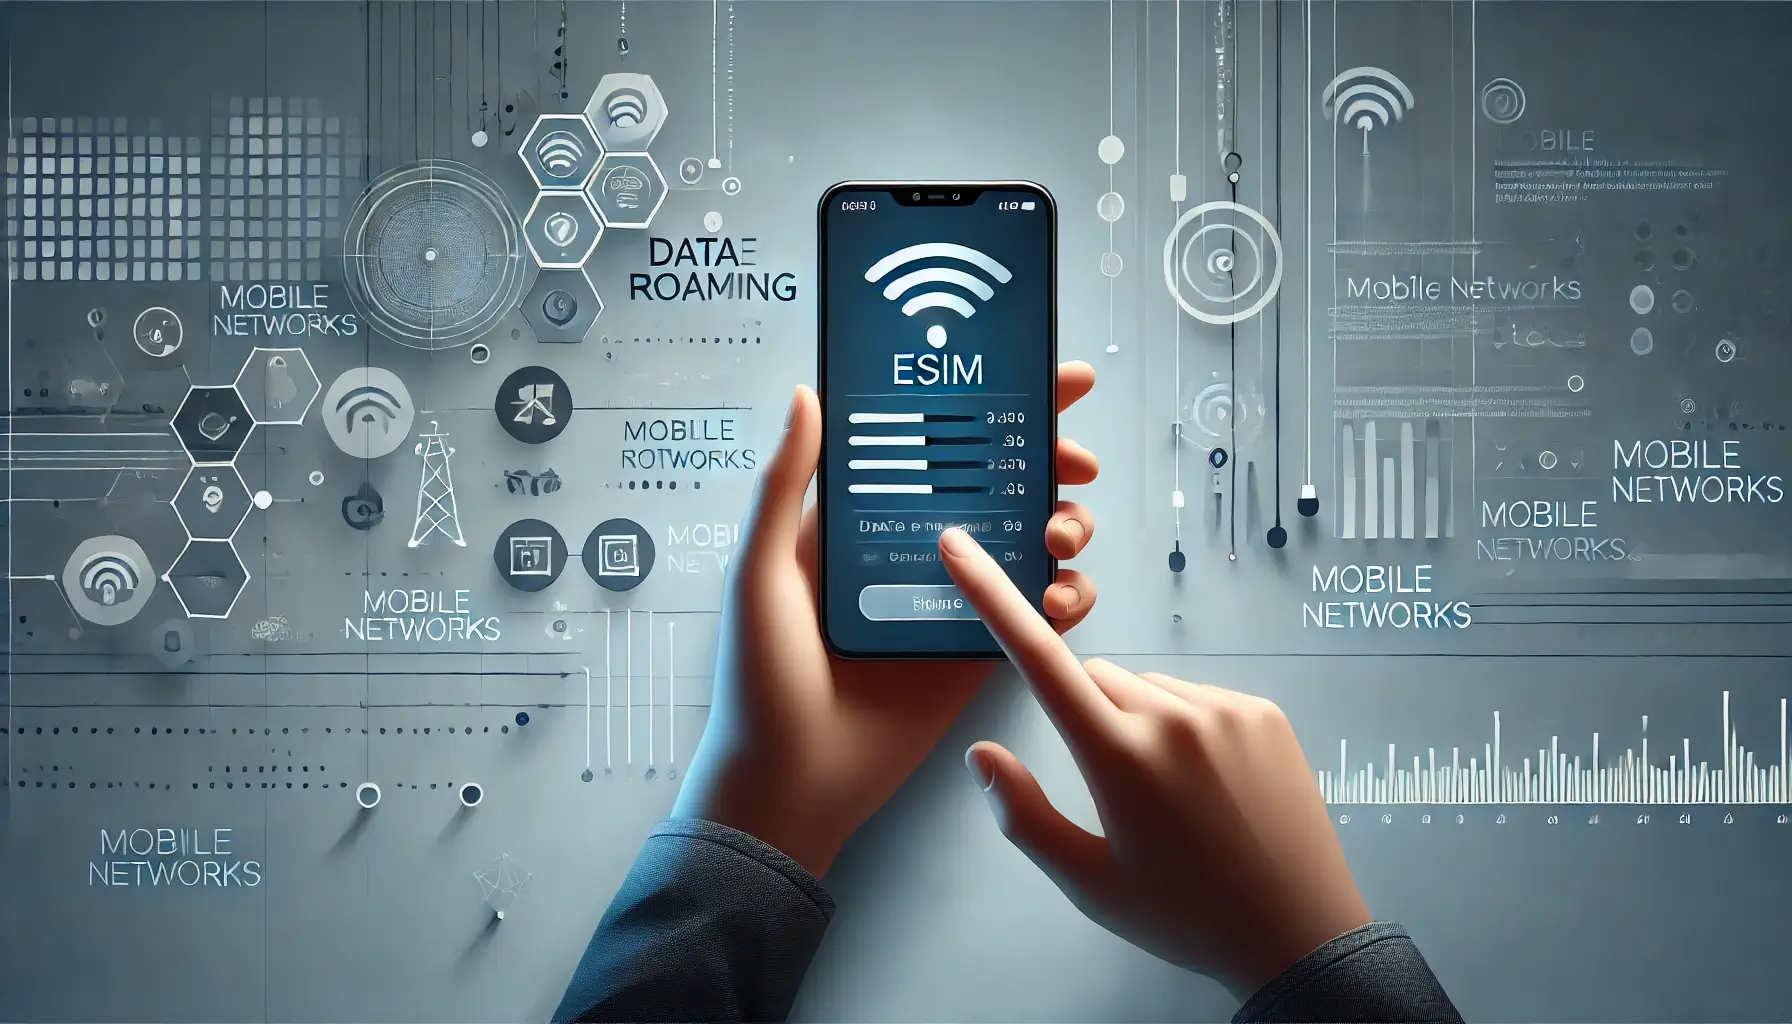
- After adding the data plan, ensure that Data Roaming is switched ON in your phone’s Settings.
- Once you arrive, if using an iPhone also ensure the Mobile data setting in your Cellular settings is set to use your new eSIM, this is the most common connection issue we see.
Tips & Reminders
- Disable Data Roaming on your primary SIM card to avoid unexpected charges.
- Consider temporarily turning off apps like iCloud Drive or Google Sync to reduce background data usage.
- If you install the eSIM before travelling, don’t forget to set it as your main data plan once you arrive at your destination.
Example (iPhone)
Here’s how to set up an eSIM on an iPhone with the correct settings:
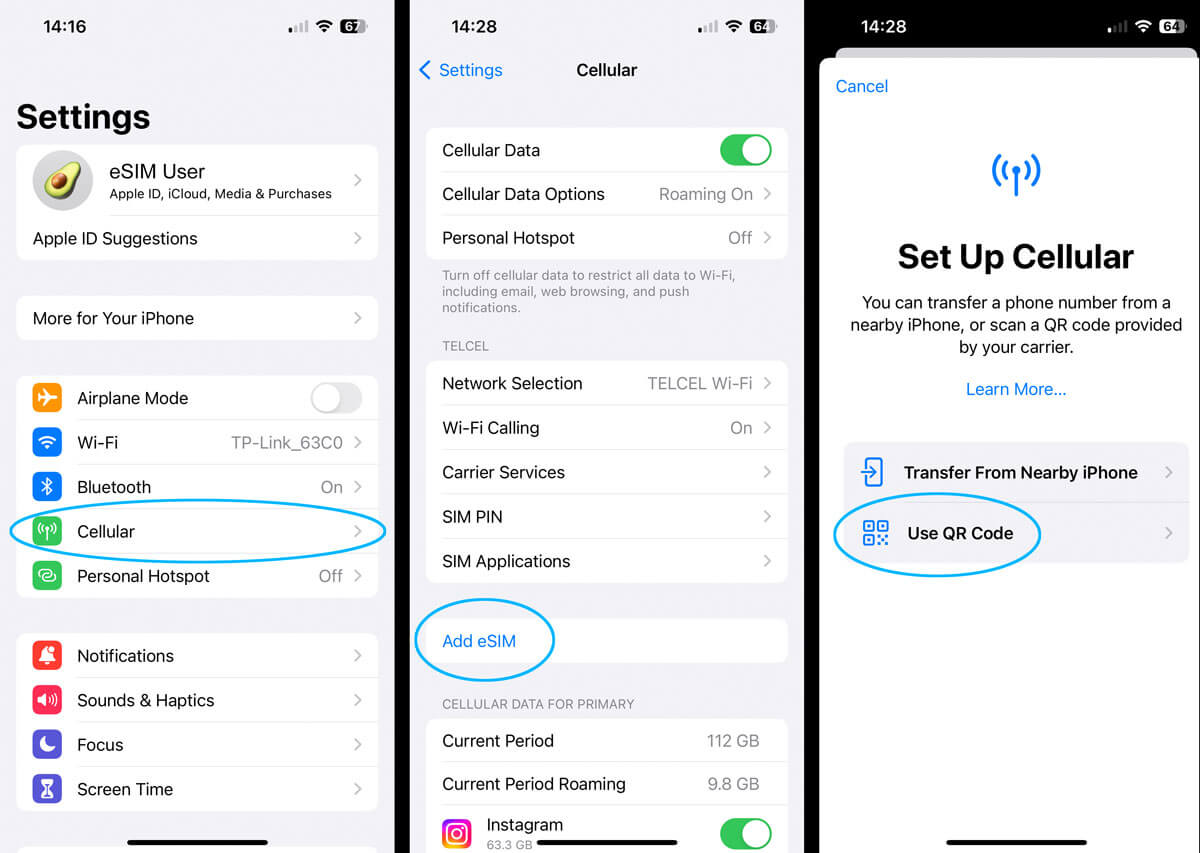
1. Add eSIM
Use the QR code to add a new secondary data plan to your phone.
Note: If the Camera app doesn’t work for scanning, you can try manual activation.
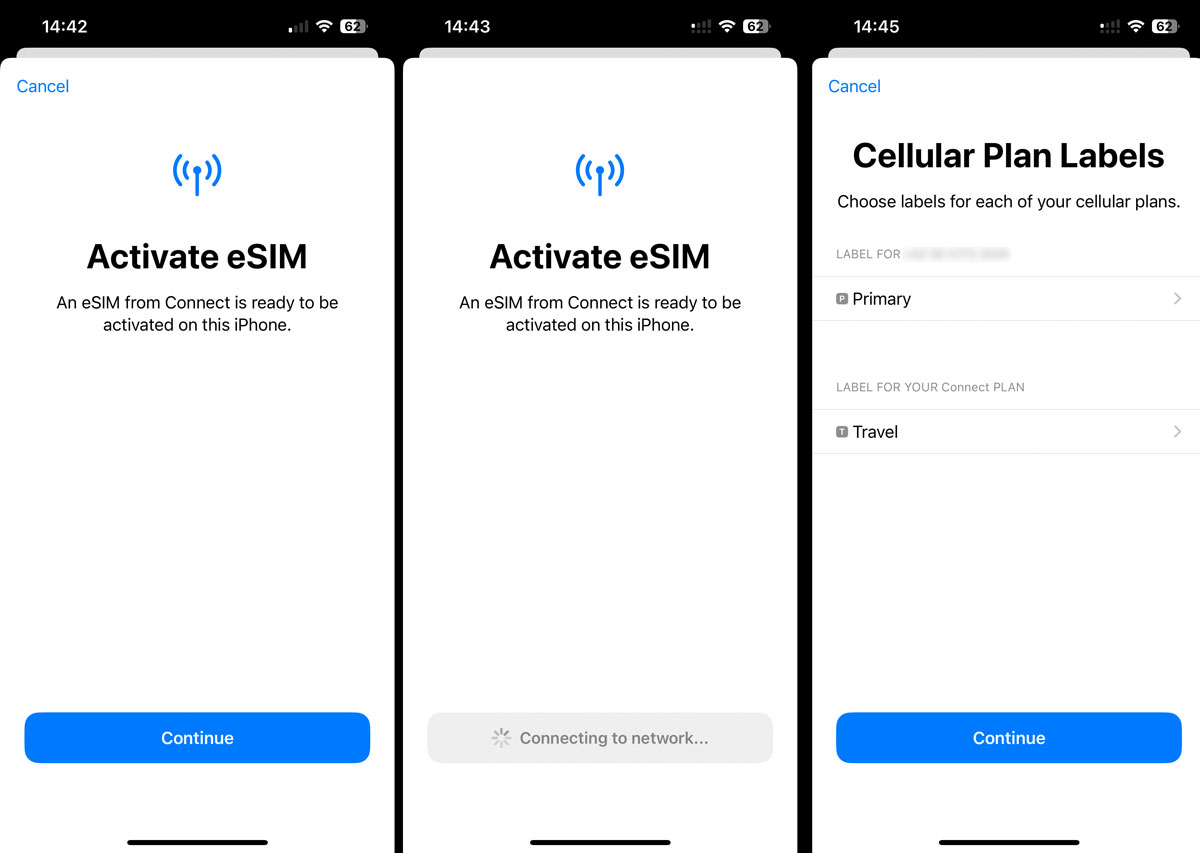
2. Activate eSIM
You can give the eSIM plan a name on your device, such as “ZenSim” or the country you’re visiting. If you're installing the eSIM prior to arriving overseas it will not actually activate until you arrive but this is AUTOMATIC so you do not need to do anything for this to happen except ensure your eSIM is turned on and set to use mobile data (explained below).
3. Choose Default Lines
Decide which plan will handle Voice/SMS, iMessage, and mobile data. Use Primary for calls and texts, and set the ZenSim eSIM for data only.
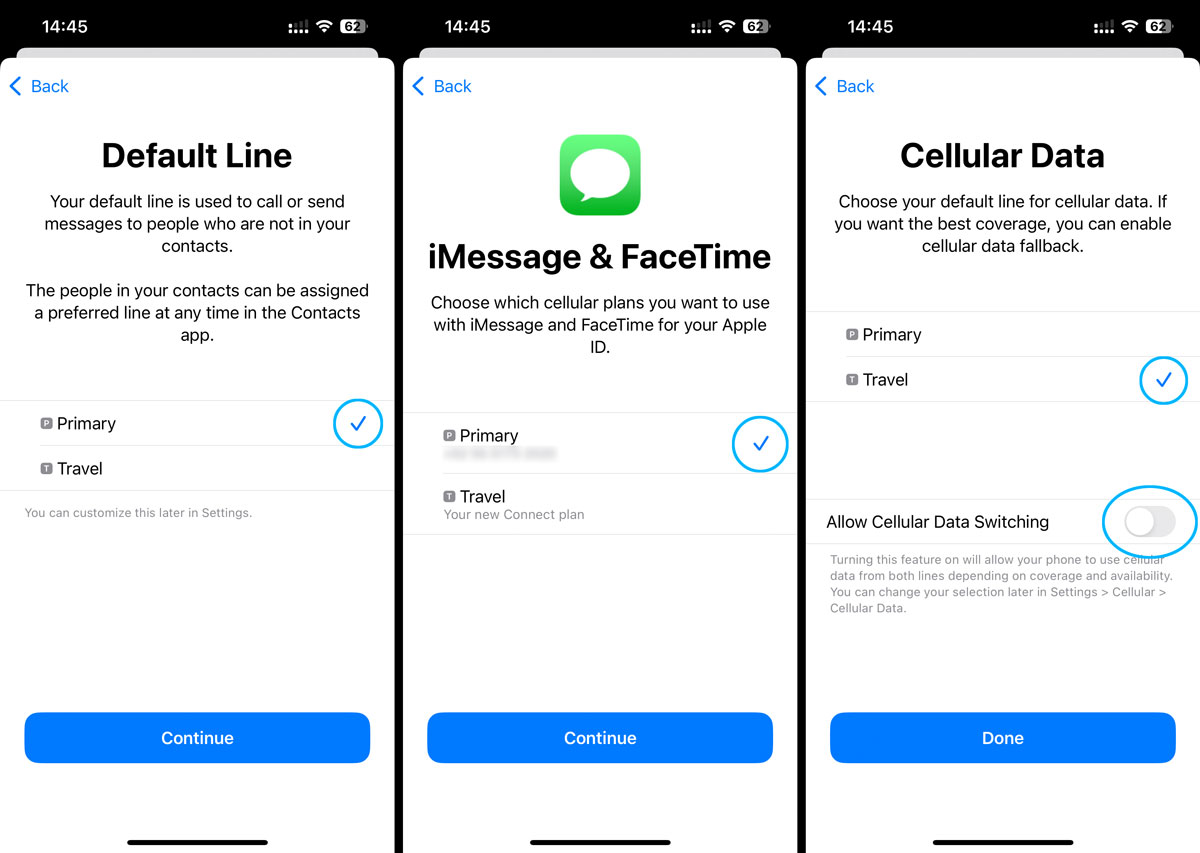
4. Enable Data Roaming
Your eSIM is now installed! You’ll see the plan in Settings with the name you selected. Ensure Data Roaming is turned ON for the eSIM and OFF for the primary line.
Connecting to the Internet
Once the eSIM is active, your device will automatically search for a signal. In most cases, a data connection (such as 5G or 4G LTE) will establish immediately, indicating you’re ready to go.
In rare cases, it could take up to 15 minutes to connect. This delay is often due to carrier or environmental factors, so patience is key.
Written by
Josh Warner
Co-founder of ZenSim, full-time banana bread lover.
Josh has been an engineer for the past 12+ years and in the telecommunications industry for the past six. A self proclaimed developer, designer, copywriter and occasional gym goer, if you have used a ZenSim website or app, it's likely Josh was the one who designed & built it.

Get amongst it
Join the community
We will reach out when we launch new products, about our sustainability projects, specials, new innovations or maybe even cool sh*t we think is inbox worthy.


